Nuggets of Information
From the Quagmire of My Mind...
Just somewhere to dump pearls of wisdom (and sometimes other stuff) from a old, tired nerd that's been doing DevOps and related things for FAR to long :)
Testing is a critical piece of the DevOps process chain, and an important feedback loop to the entire pipeline. It’s also an often overlooked piece of the puzzle, but with WATIR life is made a little simpler.
We need to have Ruby installed, and you can choose your own adventure here; and once you have Ruby installed, install Bundler globally to use for dependency management (similar to virtualenv in Python):
$ ruby --version testing
ruby 2.7.2p137 (2020-10-01 revision 5445e04352) [x86_64-darwin20]
$ gem install bundler testing
Fetching bundler-2.2.9.gem
Successfully installed bundler-2.2.9
Parsing documentation for bundler-2.2.9
Installing ri documentation for bundler-2.2.9
Done installing documentation for bundler after 3 seconds
1 gem installed
Here is a simple example that uses Watir directly with chromedriver:
# import the required libs
require 'watir'
# instantiate the browser object, and navigate to 'www.google.com'
b = Watir::Browser.new :firefox
b.goto 'http://www.google.com'
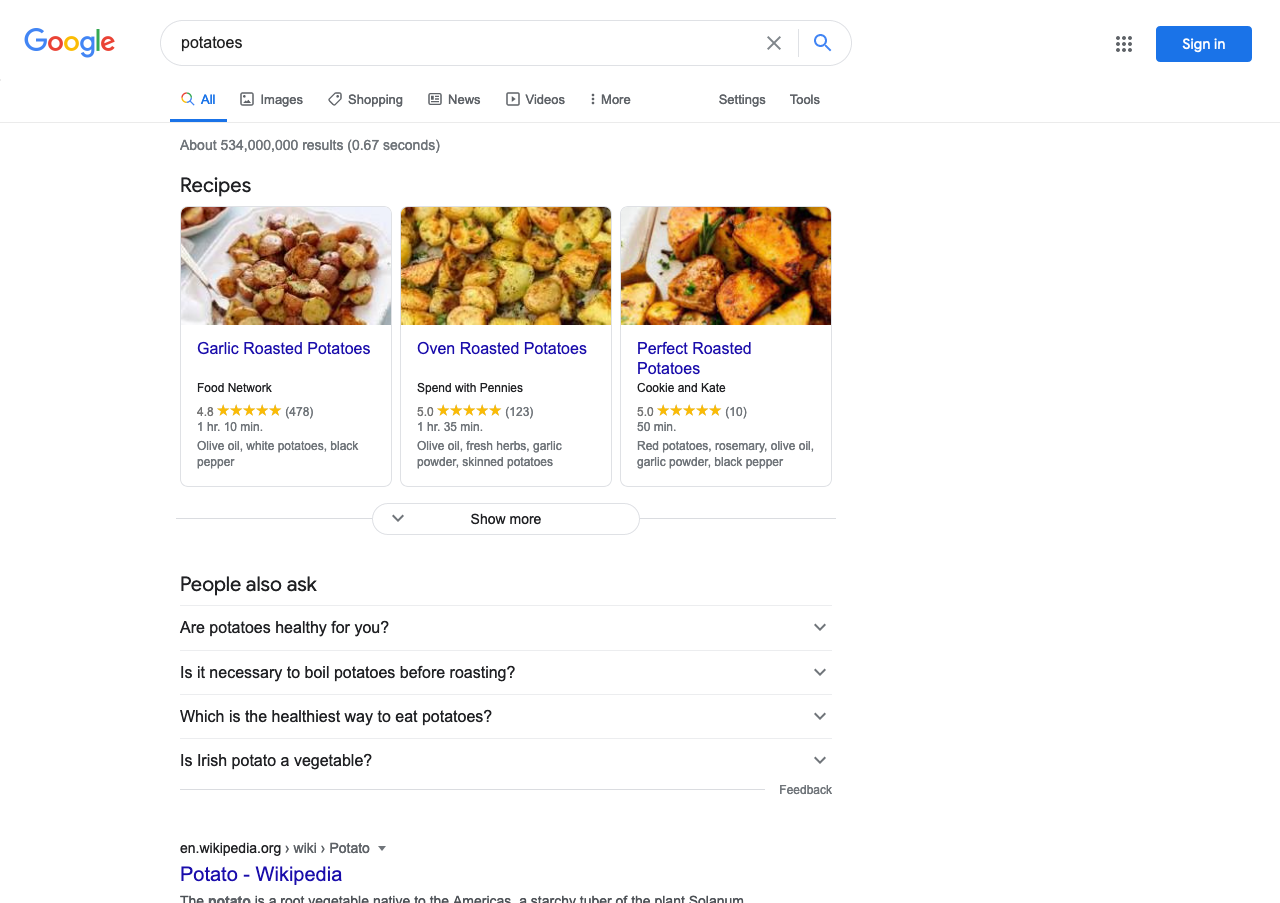
# select the textbox 'q', and set its value to 'potatoes'
b.text_field(:name => 'q').set 'potatoes'
# click the search button
b.button(:name => 'btnK').click
# save some proof of our test
b.screenshot.save 'screenshot-potatoes.png'
# close the browser
b.close
Run this test:
cat > Gemfile << EOF
source 'https://rubygems.org'
gem 'watir'
gem 'page-object'
EOF
$ bundle install testing
Using bundler 2.2.7
Using childprocess 3.0.0
Using concurrent-ruby 1.1.8
Using i18n 1.8.8
Using faker 2.16.0
Using yml_reader 0.7
Using data_magic 1.2
Using page_navigation 0.10
Using rubyzip 2.3.0
Using selenium-webdriver 3.142.7
Using regexp_parser 1.8.2
Using watir 6.17.0
Using page-object 2.2.6
Bundle complete! 2 Gemfile dependencies, 13 gems now installed.
Use `bundle info [gemname]` to see where a bundled gem is installed.
$ bundle exec ruby testing-google.rb
After running the test, check the screenshot-potatoes.png and you’ll see the proof.
Now we’ll do something a little more complex with the page-object gem, to build out actual page constructs. Similar to the example above, we can build a SearchPage object:
require 'page-object'

class GoogleSearchPage
  include PageObject

  text_field(:searchTerm, :name => 'q')
  button(:searchSelf, :name => 'btnK')

  def search(searchTerm)
    self.browser.goto("https://www.google.com")
    self.searchTerm = searchTerm
    searchSelf
  end
end
Our actual test then changes to this:
# import watir
require 'watir'
# import our custom page class
require_relative 'pages/GoogleSearchPage'
require 'fileutils'
# create a subdirectory for our screenshots
FileUtils.mkdir_p 'screenshots'
# create a new browser object
browser = Watir::Browser.new :firefox
# create our new page object, and set to use the browser
page_object = GoogleSearchPage.new(browser)
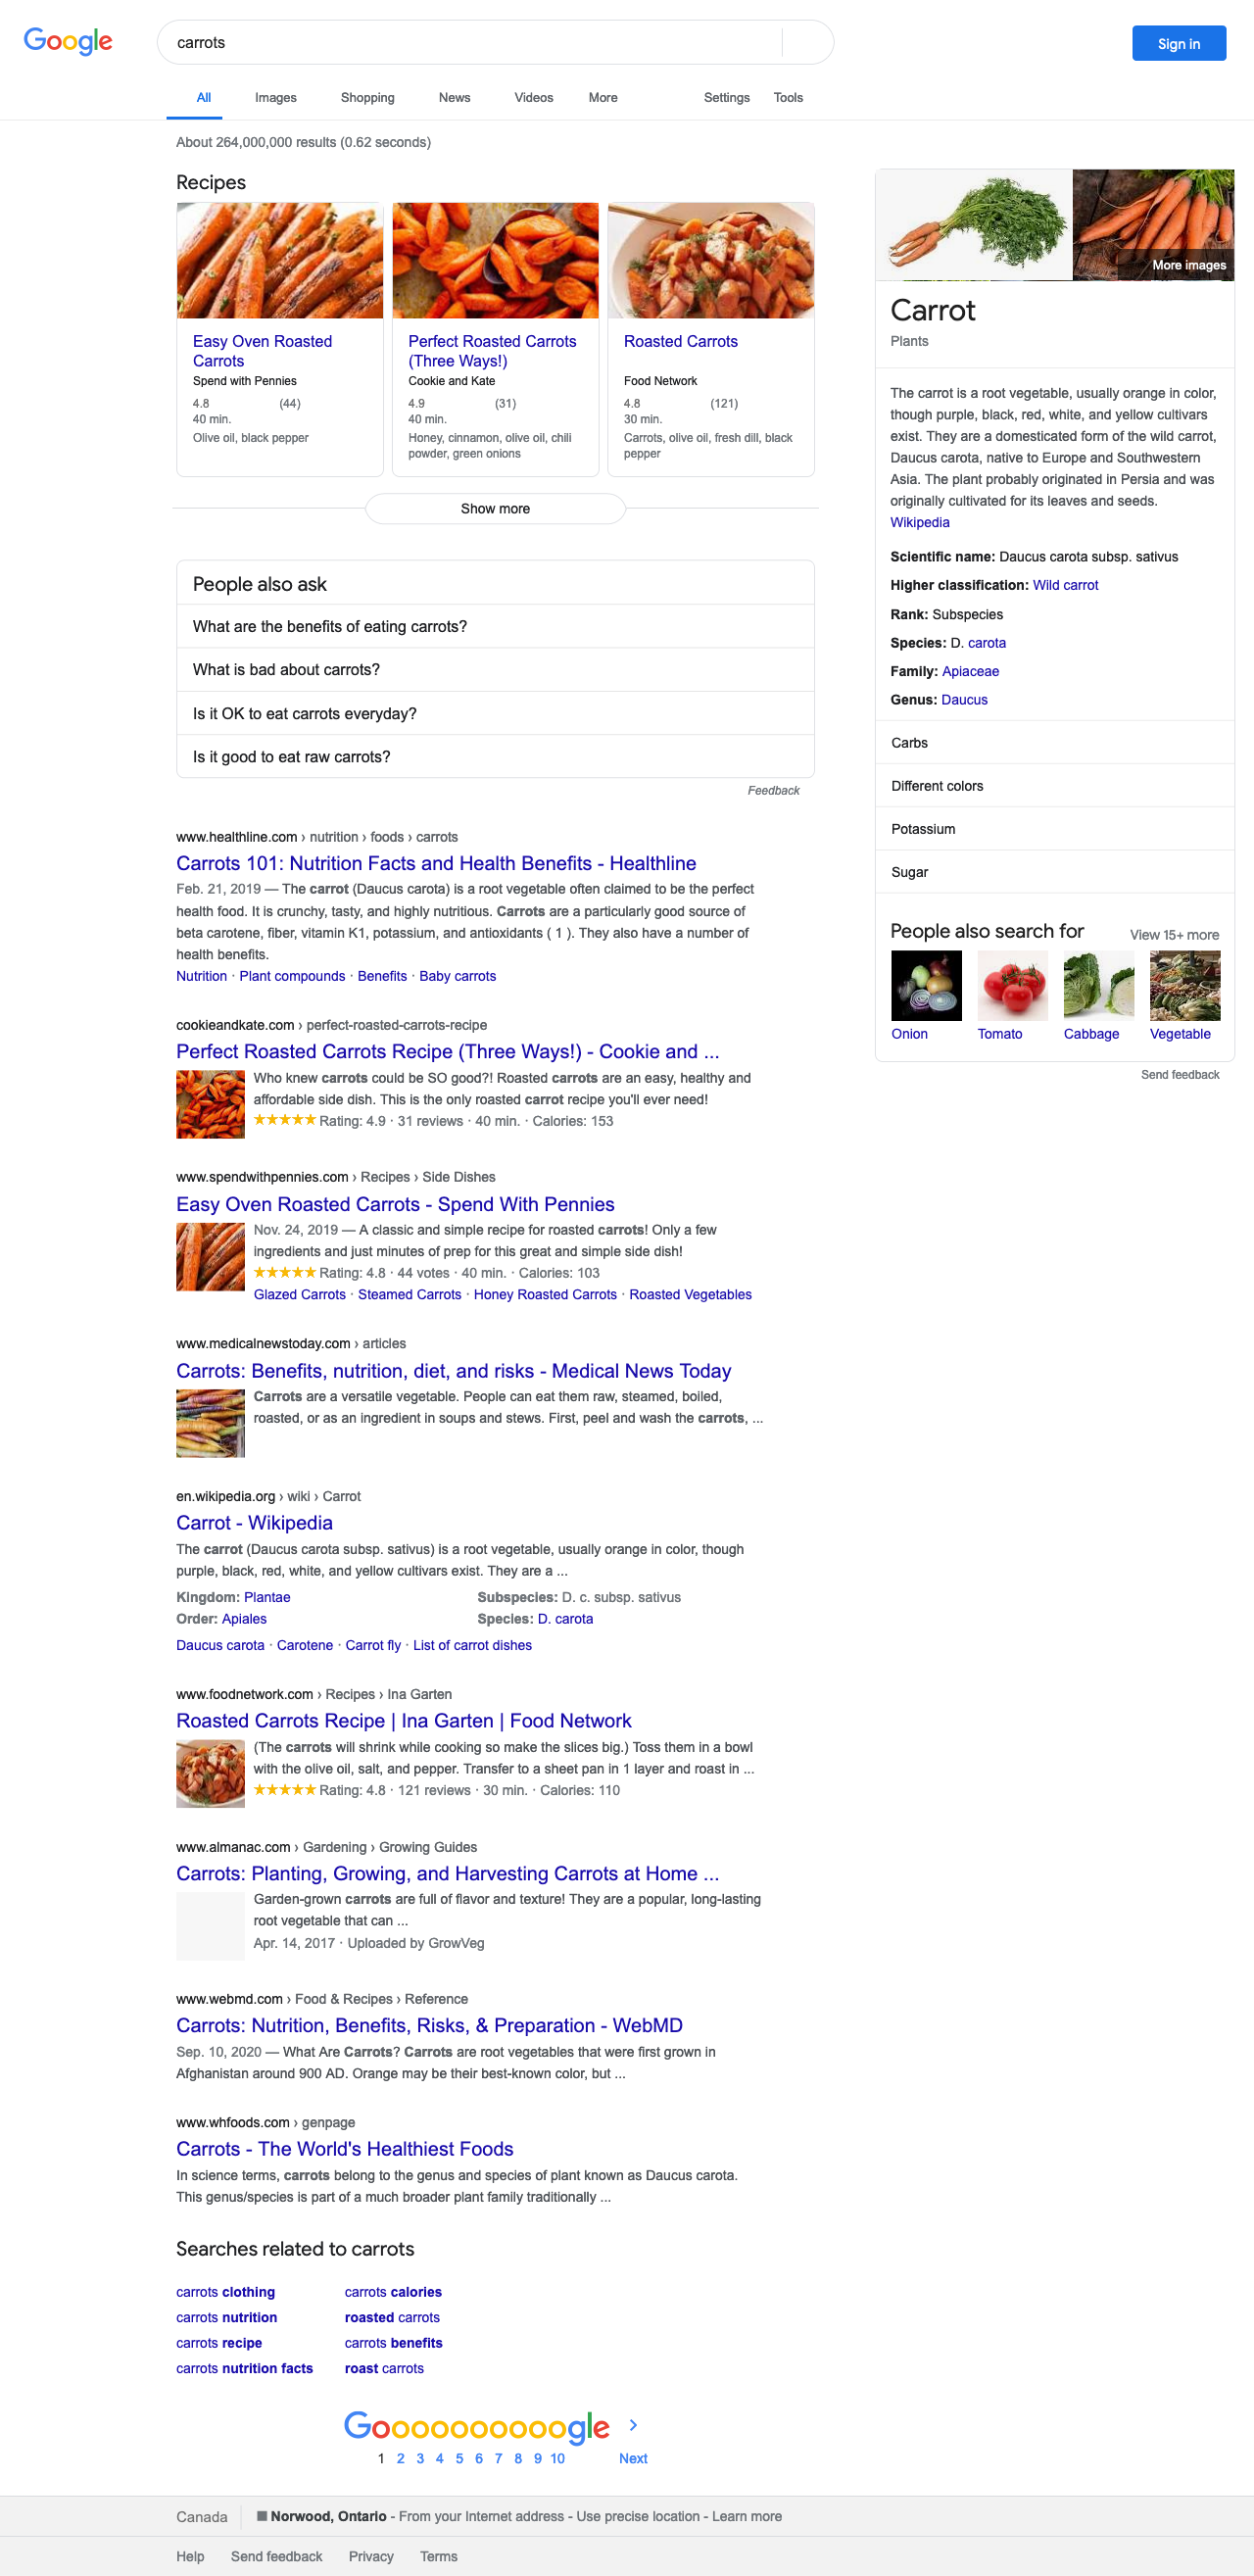
# search the page for 'carrots'
page_object.search("carrots")
# save a screenshot
browser.screenshot.save 'screenshots/carrots.png'
We can now build a bunch of different pages, and run tests against them, as well as leverage many different browser engines using the webdriver interfaces for Firefox (geckodriver), Chrome (chromedriver) or even Edge (edgedriver).
In some cases, where you want to capture the whole page and not just the viewport itself, you can add the
watir-screenshot-stitchgem (you needimagemagickinstalled locally as well -brew install imagemagickfor MacOS) and use it like this:png = browser.screenshot.base64_canvas path = "screenshots/carrots.png" File.open(path, 'wb') { |f| f.write(Base64.decode64(png)) }Then you’ll see something like this.